Install Windows 7 with pen drive step by step:
Hello friends today I am showing you how to install windows 7 on your computer with the help of a pen drive Before start to know how to install we know some basic knowledge about windows 7
Windows 7 is considered to be one of the most popular operating systems of ” MICROSOFT”.This OS has many advanced features compared to other operating systems and was developed for Personal computers released and made available on October 22, 2009.
- Step by Step Guide to Install Windows 8.
- Step by Step Guide to Install Windows 10.
Windows 7 Operating System has several silent features like faster loading time, better GUI [Graphical User Interface], new and advanced INTERNET EXPLORER. There are many versions available in the market they are:-
- HomePremium
- Professional
- Ultimate
- Enterprise Edition
- OEM
To install windows 7 from USB Pen drive or USB Flash Drive. You need to create a Bootable flash drive that contains all the important installation files which are necessary to install a copy of windows 7.
You can create or make a bootable pen drive using any free software like Novicorp win to flash or Rufus. System Requirements for installing windows 7 using USB Pen drive to your computer.
System Requirements To Install Windows 7:-
- "Bootable Pen drive. Create Bootable Pen drive."
- "Bios Which Support's USB Boot."
- "1.0 GHz CPU or Equivalent."
- "1 GB Ram Or Above."
- "Hard disk More Than 10 Gb."
Step By Step Guide With Pictures To Install Windows 7 Using Pen drive:-
Step 1:- Plug Your Pen drive In One Of the USB Slot Which are Present In The Case / Cabinet ...Your Pen drive Must Be Bootable. If Not Create Your Pen drive Bootable.
Step 2:- Go to CMOS Setup / Bios Configuration By Continuous Pressing DEL Key From Keyboard Some common Keys are F1, F2, F10, F12
{Tip:- Go To Your Manual And Find Which key to Hit to Go to CMOS Setup ...Sometimes It can be seen while Computer starts at the Bottom of The Screen}
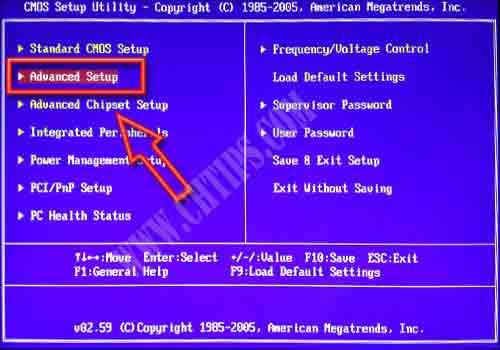
Step 3:- Go To Advanced Setup And Press Enter.....
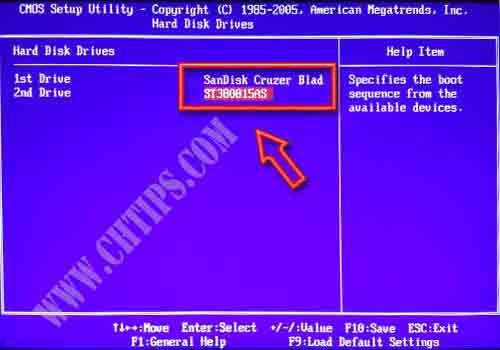
Step 4:- Select 1st Drive With Your Pen drive Here In The Below Picture I Have Used SanDisk Pen drive. You Can Choose Yours...And Select the 2nd Device As a Hard disk. You can also change the setting by page up and page down key or + - keys from the keyboard...
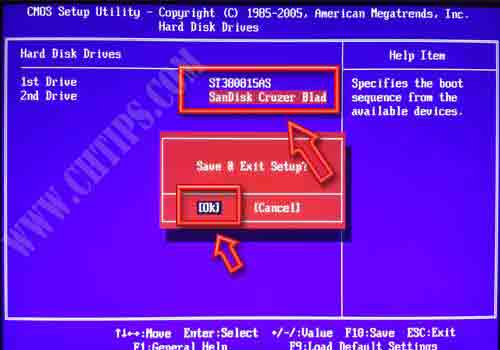
Step 5:- Press F10 From Keyboard ...& save the changes...Now computer Will Restart ...And Setup Will Begin Installation
Step 6:- The Below Picture Indicated That the windows 7 operating system Is Loading...

Step 7:- Setup Is Starting Windows 7 Installation... After installing your windows you choose the specific option as shown in part-8 let's continue
Step 8:- Select language To Install = English...Time and currency Format =English (United States) ....Keyboard Input Method= us and Click on Enter ......If from Other Region You Can According to Your Location
Step 9:- Windows Setup Is Starting it takes times to start after starting the windows the new dialogue box appear on your screen that is check license let's continue part-10
Step 10:- Read The Windows License Agreement Carefully ....Check The Box (I Accept The License Terms) & Click On Next
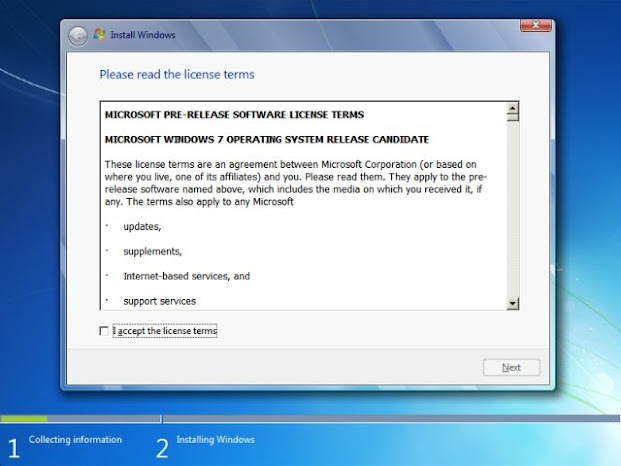
Click on {i accept the license terms} Click the next button.
Step 11:- Now Click On Custom Installation If You Wish A Fresh Windows 7 Installation...You can Also Select Upgrade Option If You want to Upgrade Existing Operating system ...Here We are Going to Select custom (Advance Option ) As we need a fresh Windows 7 Installed On Our Computer
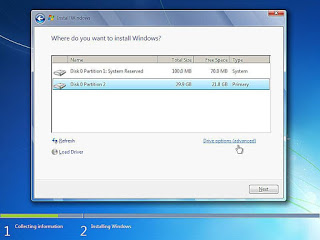
Step 12:- Here In The Below Picture, I have created a Partition. You can Delete the Existing Partition by simply clicking on Delete ...and after deleting all partition click On New To create a new partition on the drive...while creating a partition Use Size In MB Rather Than in GB.
Now just click On the Partition Where you Need to Install Win7. Here I have selected Disk 0 Partition 2 and click.
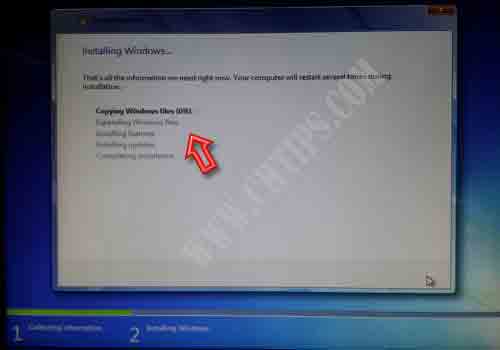
Step 13:- Setup is copying Windows 7 Files to Your Hard disk.
Step 14:- Now When the computer Restart Go To CMOS Setup / Advanced Bios configuration And change the Boot Setting TO 1st Drive:: Your Hard disk Here I Have Selected my hard disk... And 2nd drive:: Your pen drive mine Is SanDisk...Restart The computer After saving the changes...

Step 15:- Type The Name Of the account and Click On Next...
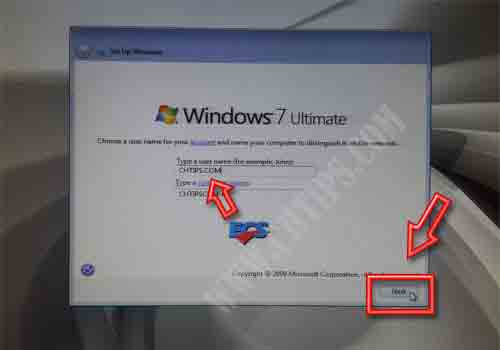
After type, the name of the account you can also set the password and another set the major settings. That is:- Time/ date, wallpaper setting, etc. Your windows 7 is installed on your computer

Post a Comment
This site uses Akismet to reduce spam. Learn how your comment data is processed.